How to properly measure and cut wood for precise wooden artistry?

In this step-by-step guide, we will show you how to properly measure and cut wood for precise wooden artistry. Wooden artistry is a beautiful form of craftsmanship that allows you to create elegant and intricate wooden pieces. Whether you are a beginner or an experienced woodworker, accurate measurements and precise cuts are essential for achieving the desired outcome. This guide will provide you with the knowledge and techniques to ensure that your wooden artistry projects turn out perfectly every time. Let’s get started!
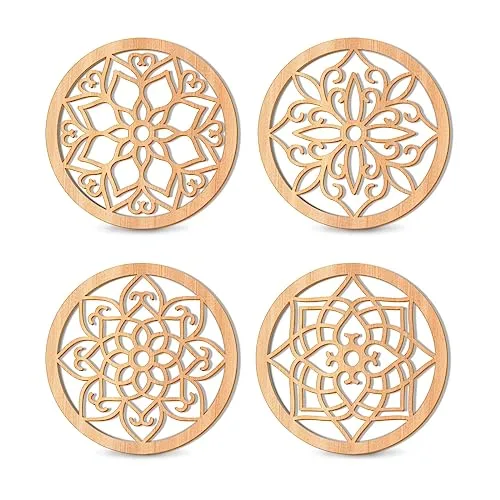
Exquisite Handcrafted Masterpieces


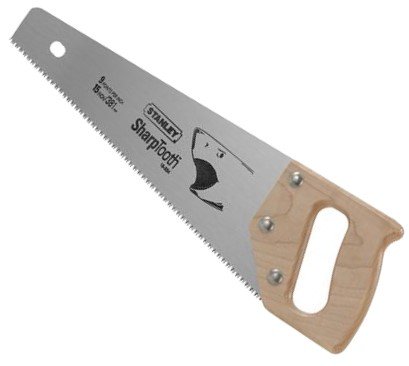
Gathering the necessary tools and materials
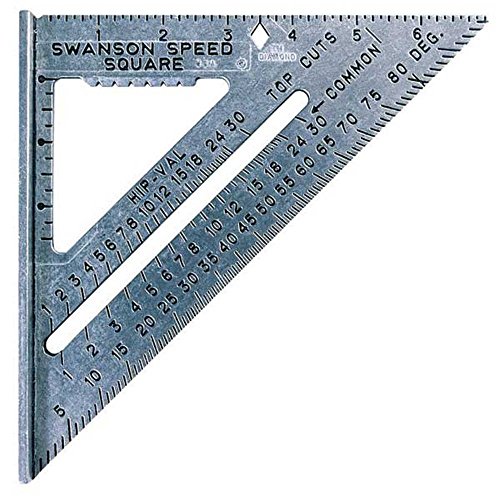
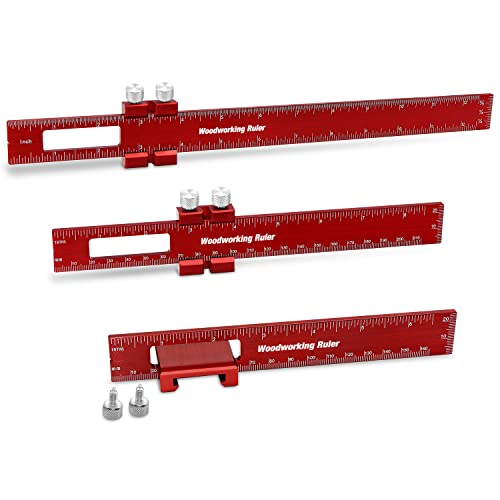
To gather the necessary tools and materials for measuring and cutting wood for precise wooden artistry, first, gather a measuring tape, a pencil, a straightedge ruler, a miter saw, and the wood you’ll be working with. Make sure the measuring tape is accurate and easy to read, and the pencil is sharp for accurate marking. The straightedge ruler should be long enough to span the length of the wood, and the miter saw should be in good working condition. Lastly, ensure you have the appropriate type and size of wood for your project.

Measuring the wood accurately
To measure the wood accurately, start by using a measuring tape. Measure the length, width, and thickness of the wood you need to cut. Be sure to measure from the appropriate reference points, such as the edges or corners, to ensure precise measurements. Record these measurements accurately, either by writing them down or using a digital device.
Marking the cut lines
To mark the cut lines on the wood, take a pencil and refer to the measurements. Start by making small marks at the appropriate points along the wood, ensuring accuracy. Then, connect the marks with straight lines, using a ruler or straight edge for precision. For example, if you are cutting a piece of plywood to a specific length, measure and mark the starting and ending points with a pencil, and then draw a straight line connecting the two marks. This will help guide your saw or cutting tool and ensure a clean, accurate cut.
Setting up the cutting tool
To prepare the cutting tool, start by ensuring that the miter saw or any other cutting tool is securely mounted on a stable surface. Next, adjust the blade angle and height to match the desired cut and the type of wood you are working with. Use the appropriate tools to make precise adjustments, ensuring that the blade is set at the correct angle and height for the best results. Double-check your adjustments before proceeding to ensure safety and accuracy in your cuts.


Safety precautions
When it comes to safety precautions, it is crucial to wear the appropriate safety gear. For instance, put on safety goggles to protect your eyes from any flying debris, and wear gloves to shield your hands from sharp edges or hot surfaces. Additionally, make sure your work area is clean and free of any obstructions that could cause accidents or mishaps. Lastly, take the time to familiarize yourself with the safety features and proper operation of the cutting tool you are using. Knowing how to use it correctly will minimize the risk of injuries.
Making the cuts
To make the cuts, start by placing the wood securely on the cutting surface. Make sure to align the marked cut lines with the blade of the cutting tool. Once you have done that, hold the wood firmly and activate the saw to begin the cut. Remember to maintain a steady and controlled motion throughout the cutting process.
Checking the accuracy of the cuts
To check the accuracy of the cuts, follow these steps:
- After making each cut, take a moment to thoroughly examine the wood.
- Using either a straightedge ruler or a measuring tape, carefully measure the dimensions of the cut pieces.
- Ensure that the measurements match the intended dimensions specified in your project plans.
- Pay close attention to any irregularities or discrepancies in the cuts, and make necessary adjustments as needed.
By diligently inspecting and measuring the wood after each cut, you can ensure that your cuts are accurate and precise, resulting in high-quality work.
Trimming or adjusting the cuts if needed
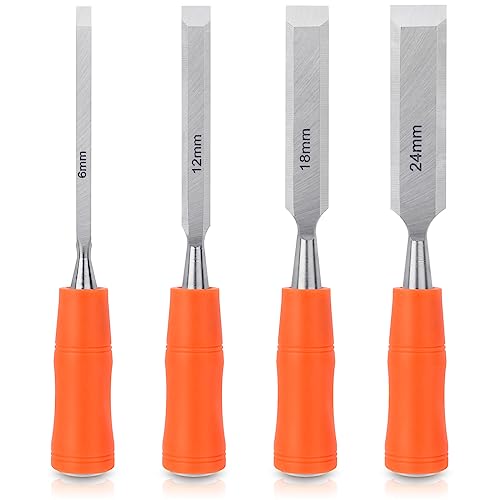
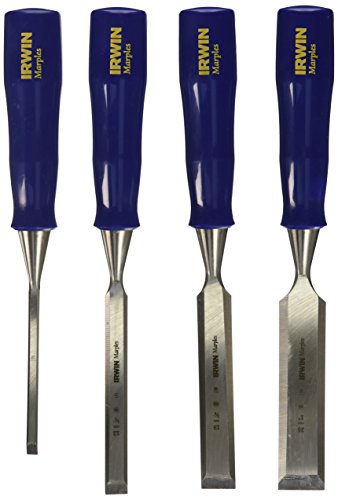
To trim or adjust the cuts if needed, start by assessing the woodwork for any imperfections. If you notice any uneven edges or excess material, grab your tools such as sandpaper, a file, or a plane. Carefully work on the specific area that requires adjustment, making small and gradual changes. For example, if you have a piece of wood that is slightly too long, use a saw or a plane to trim it down to the desired length. Remember to take your time and work patiently to achieve the precise result you’re aiming for.
Repeating the process for additional cuts
To make multiple cuts, simply follow these steps for each piece of wood:
- Measure: Use a ruler or tape measure to determine the desired length for your cut. For example, let’s say you need a piece of wood that is 12 inches long.
- Mark: Once you have measured the length, use a pencil or marker to make a clear mark on the wood where you will make the cut. In our example, you would make a mark at the 12-inch point.
- Cut: With your mark in place, carefully position the saw blade or cutting tool at the marked spot. Follow the manufacturer’s instructions for using the specific cutting tool you are using. In our example, you would position the saw blade at the 12-inch mark and proceed to make the cut.
- Repeat: If you need to make additional cuts, go back to step 1 and repeat the process for each piece of wood. Remember to measure, mark, and cut with precision to ensure consistency in your final pieces.
By following these steps and maintaining consistency in your measurements and precision, you can easily make multiple cuts with ease and accuracy. Happy cutting!
Cleaning up the work area
To clean up your work area after completing all the necessary cuts, follow these steps:
- Remove any wood scraps, dust, or debris from the work surface using a broom or vacuum cleaner.
- Dispose of the waste materials in the appropriate bins or containers.
- Store your tools properly by placing them back in their designated places or in a toolbox.
- Ensure that all power tools are turned off and unplugged.
- Keep the work area well-organized to prevent accidents and make it easier for future projects.By following these instructions, you can maintain a clean and safe work environment.
Expert Tips for Perfect Results
In conclusion, we have explored the importance of accurately measuring and cutting wood for precise wooden artistry. We have seen that taking precise measurements and making clean cuts are crucial for achieving the desired results. Additionally, we have emphasized the significance of practicing safety precautions throughout the process.
By following the techniques and tips discussed in this guide, you can experience the satisfaction and pride that comes with creating precise wooden artistry. Remember, practice makes perfect, so be patient and persistent in honing your skills. With each project, you will continue to improve and create beautiful works of art.
So, go ahead and start measuring and cutting wood with precision. We are confident that by implementing these methods, you will achieve the level of craftsmanship you desire. Happy woodworking!
Essential Supplies


Mastering Woodworking Techniques
Getting the most out of your elegant wooden artistry
- Start by selecting a piece of elegant wooden artistry that catches your eye. Look for unique patterns, intricate designs, or special craftsmanship that appeals to you
- Decide where you want to display your wooden artwork. It could be a prominent spot in your living room, a cozy corner in your bedroom, or even as a centerpiece on your dining table
- Make sure to clean and dust the wooden art regularly to maintain its beauty. You can use a soft cloth or a feather duster to remove any dirt or debris
- If you want to enhance the shine and longevity of your wooden art, consider using a wood polish or wax. Apply it gently with a soft cloth, following the manufacturer’s instructions
- Finally, don’t be afraid to experiment with different arrangements or combinations. You can mix and match your elegant wooden artistry with other decorative elements such as plants, candles, or books to create a personalized and visually appealing display
- Remember, the key is to enjoy and appreciate the beauty of your elegant wooden artistry while adding a touch of sophistication to your space. Happy decorating!
Frequently Asked Questions about our Exquisite Wooden Artistry
How can one differentiate between mass-produced wooden crafts and handmade elegant wooden artistry?
When it comes to differentiating between mass-produced wooden crafts and handmade elegant wooden artistry, there are a few key factors to consider.
First, let’s look at the overall quality and finish of the piece. Handmade wooden artistry often exhibits a higher level of craftsmanship, with attention to detail and a refined finish. Each piece may have unique characteristics and imperfections that add to its charm and authenticity. On the other hand, mass-produced wooden crafts tend to have a more uniform appearance, with less individuality and attention to detail.
Next, take a closer look at the construction and joinery of the piece. Handmade wooden artistry often incorporates traditional techniques and methods, such as dovetail joints or mortise and tenon joints. These techniques require skill and expertise, resulting in a sturdier and more durable piece. In contrast, mass-produced wooden crafts may use simpler and quicker methods of construction, such as screws or nails.
Another factor to consider is the materials used. Handmade wooden artistry often utilizes high-quality, sustainably sourced wood that is carefully selected for its beauty and durability. The wood may be hand-carved or shaped, showcasing the natural grain and texture. In contrast, mass-produced wooden crafts may use cheaper materials or incorporate synthetic elements to cut costs.
Lastly, consider the overall design and uniqueness of the piece. Handmade wooden artistry often showcases original and artistic designs that are carefully thought out and executed. Each piece may have a story behind it, reflecting the creativity and vision of the artist. Mass-produced wooden crafts, on the other hand, tend to follow more standardized designs and lack the personal touch and uniqueness that comes with handcrafted pieces.
By considering these factors – quality, construction, materials, and design – you can begin to differentiate between mass-produced wooden crafts and handmade elegant wooden artistry. Remember, each piece has its own merits, but handmade artistry often carries a sense of passion, individuality, and craftsmanship that sets it apart.


Yes, I have experimented with different cutting tools for different projects. I agree that a miter saw can provide more precise cuts compared to a hand saw. It really depends on the specific project and the level of precision required.
I followed this guide and was able to create a stunning wooden sculpture. It was my first time attempting wooden artistry, and I’m thrilled with the results. Thank you for the step-by-step instructions!
I found that using a miter saw instead of a hand saw gave me more precise cuts. Have you tried using different cutting tools for different projects?
I found that using a router for trimming or adjusting the cuts gave me more precise results. What are your thoughts on using a router for wooden artistry?
Using a router for trimming or adjusting cuts can definitely provide more precise results, especially for intricate designs. It’s a great tool to have in your arsenal for wooden artistry. Just make sure to practice and take necessary safety precautions when using a router.
I used the techniques from this guide to create a unique wooden clock for my office. The measurements and cuts were perfect, and the end result is stunning. Thank you for the detailed guide!
I had some trouble with getting accurate measurements because my tape measure wasn’t very reliable. Any tips on how to ensure accurate measurements?
I understand your frustration. To ensure accurate measurements, it’s important to use a high-quality tape measure and double-check your measurements before making any cuts. You can also consider using a measuring square or a digital measuring tool for increased accuracy.
I followed this guide and was able to create a beautiful wooden art piece for my living room. The measurements and cuts were spot on, and the instructions were easy to follow. Thank you for such a helpful guide!
I would suggest using a wood conditioner before staining the wood. It helps to prevent blotching and ensures an even finish. This can be especially important for achieving an elegant wooden artistry look.
That’s a great tip! Using a wood conditioner before staining can definitely help achieve a more even and professional-looking finish. Thank you for sharing!
Can you recommend a specific brand or model of cutting tool that works well for precise wooden artistry? I’m in the market for a new one and would appreciate any suggestions.
I think it’s important to discuss the different types of wood that are best suited for elegant wooden artistry. Some woods may be more prone to splitting or warping, so it would be helpful to know which woods to avoid.