How to design and build custom wooden furniture pieces?

In this step-by-step guide, we will take you on a journey through the fascinating world of contemporary wood craftsmanship. Our aim is to help you design and build your very own custom wooden furniture pieces. Whether you’re a beginner or an experienced DIY enthusiast, we’ve got you covered.
We understand that designing and building furniture can be a daunting task, but with our guide, we’ll break it down into simple and manageable steps. From selecting the right type of wood to creating detailed designs, we’ll provide you with all the necessary information and tips to bring your vision to life.
Throughout the guide, we will emphasize the importance of safety and provide you with essential tools and techniques to ensure a successful and enjoyable woodworking experience. We’ll also discuss various woodworking methods, such as joinery and finishing, to help you achieve professional-looking results.
Our goal is to empower you to create unique and personalized furniture pieces that reflect your style and taste. We believe that everyone has the potential to become a skilled woodworker, and with our guidance, you’ll be able to unlock your creativity and unleash your inner craftsman.
So, whether you’re looking to build a rustic dining table, a sleek bookshelf, or a cozy rocking chair, join us as we embark on this exciting journey of designing and building custom wooden furniture pieces. Trust us, it’s a rewarding and fulfilling experience that you won’t want to miss out on. Happy woodworking!
Masterpieces in Modern Woodworking
Gathering Materials and Tools
To design and build custom wooden furniture pieces, you will need a variety of materials and tools. Here is a detailed list to get you started:
Materials:
- Wood: We recommend using hardwoods such as oak, walnut, or cherry for their durability and beautiful grain patterns. Softwoods like pine or cedar can also be used for certain designs.
- Plywood: This is useful for building the carcass or inner structure of the furniture.
- Veneer: If you want to add decorative patterns or finishes to your furniture, veneer is a great option.
- Screws, nails, and other fasteners: These will be needed to join the different wood pieces together.
- Wood glue: Essential for strong and long-lasting bonds between wood pieces.
- Sandpaper: Different grits will be needed to smooth the wood surfaces.
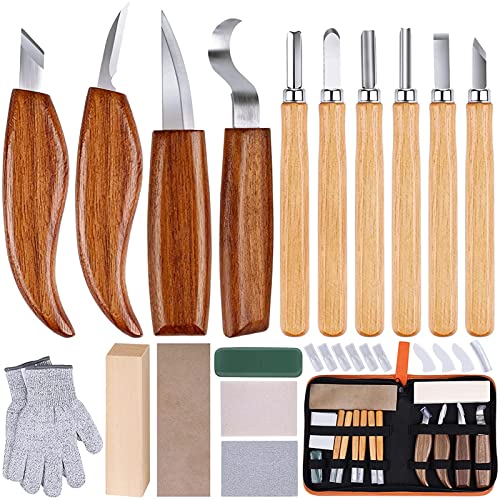
Tools:
- Circular saw or table saw: These are essential for cutting the wood to the desired sizes and shapes.
- Chisels: Useful for carving or shaping the wood.
- Router: Great for creating decorative edges or grooves in the wood.
- Clamps: These will help secure the wood pieces together while the glue dries.
- Drill and drill bits: Needed for making holes for screws or dowels.
- Measuring tools: A tape measure, ruler, and combination square will be useful for accurate measurements.
- Sander: A power sander or sanding block will make the sanding process quicker and easier.
- Finishing tools: Brushes, rollers, or spray guns for applying stains, varnishes, or paints.
Remember, the specific materials and tools you choose will depend on the furniture design you have in mind. It’s always a good idea to consult with a professional or do some research to ensure you have the right materials and tools for your project. Happy woodworking!

Planning and Design
To create a design plan for your custom furniture pieces, accurate measurements are crucial. Start by measuring the dimensions of the space where the furniture will be placed, as well as any doorways or hallways it needs to pass through. Next, create sketches or blueprints to visualize your ideas. Consider both functionality and aesthetics when designing your furniture, ensuring it fits well in the space and complements the existing decor. For example, if you’re planning a dining table, measure the available space, sketch out the table’s shape and size, and consider the materials and finishes that will match your dining area.
Preparing the Wood
To prepare the wood for your project, start by cutting the wood to the desired length and shape using a saw. Next, use a chisel or router to shape the edges and create precise angles. After that, sand the wood thoroughly using different grits of sandpaper, starting with a coarse grit and gradually moving to finer grits. This will help achieve smooth surfaces and remove any rough edges. Remember to sand in the direction of the wood grain for the best results.
Joinery Techniques
In woodworking, there are several joinery techniques that are commonly used to create strong and durable furniture. One such technique is the mortise and tenon joint, which involves cutting a rectangular hole (mortise) in one piece of wood and inserting a corresponding projection (tenon) from another piece of wood into it. This joint is commonly used to join legs to tabletops or frame pieces together.
Another popular joinery technique is the dovetail joint, known for its strength and decorative appeal. This joint involves cutting interlocking wedge-shaped projections (tails) on one piece of wood and corresponding notches (pins) on another, creating a tight-fitting joint. Dovetail joints are often used in drawer construction, as well as for joining corners of boxes and cabinets.
For simpler and quicker joinery, the biscuit joint is a popular choice. This technique involves cutting slots into two pieces of wood and inserting an oval-shaped biscuit (usually made of compressed wood) into the slots, which then swells up when glue is applied, creating a strong bond. Biscuit joints are often used in edge-to-edge or mitered joints, such as when joining tabletops or cabinet frames.
To ensure strong and durable furniture construction, it is important to choose the appropriate joinery technique based on the specific application and the desired aesthetics. For example, if you are building a solid wood table, using mortise and tenon joints to attach the legs to the tabletop will provide excellent strength and stability. On the other hand, if you are constructing a drawer, using dovetail joints will not only add strength but also enhance the overall appearance.
When using these joinery techniques, make sure to accurately measure and mark the locations where the joints will be cut. Use sharp woodworking tools, such as chisels, saws, or routers, to accurately cut the necessary slots, notches, or mortises. Apply woodworking glue to the joints before assembling the pieces, ensuring that excess glue is wiped away to avoid any unsightly residue. Finally, clamp the pieces together firmly until the glue dries, ensuring a tight and secure bond.
Remember, practice makes perfect when it comes to joinery techniques. Don’t be discouraged if your first attempts are not perfect – with time and experience, you will become more proficient in creating strong and durable furniture using these joinery techniques.


Assembly and Joining
In this guide, we will walk you through the process of assembling and joining the various wooden components to create your furniture piece. To ensure a strong and durable construction, we will provide detailed instructions on gluing, clamping, and fastening techniques. Follow these step-by-step instructions to achieve a successful assembly:
- Gluing: Apply a thin and even layer of wood glue to the mating surfaces of the wooden components to be joined. Spread the glue evenly using a small brush or a toothpick, ensuring complete coverage.
- Clamping: Align the components together and use clamps to hold them firmly in place. Position the clamps at regular intervals along the length of the joint to distribute pressure evenly. Tighten the clamps until the glue squeezes out slightly, indicating a proper bond.
- Fastening: For additional strength and stability, consider reinforcing the joints with screws, nails, or dowels. Predrill pilot holes to avoid splitting the wood, and then insert the fasteners, making sure they are flush with the surface. Use a countersink bit if you want the fasteners to be concealed.
Remember, precise measurements and careful alignment are crucial for a seamless assembly. Take your time to ensure all components fit together snugly before proceeding. With these detailed instructions, you’ll be able to confidently assemble and join your wooden components, creating a beautifully crafted furniture piece.
Finishing and Surface Treatment
Finishing and surface treatment are crucial steps in enhancing the appearance and durability of furniture. To achieve a professional finish, start by sanding the surface using fine-grit sandpaper to smoothen any imperfections. Next, apply a stain or paint of your choice using a brush or roller, following the manufacturer’s instructions. Once dry, protect the surface by applying a clear protective coat, such as polyurethane or varnish, using long, even strokes. Remember to allow sufficient drying time between each step for best results.
Hardware Installation
To install hardware components such as handles, knobs, hinges, and drawer slides, start by determining the placement of each piece. Use a measuring tape to ensure accurate alignment and mark the desired position with a pencil. Next, use appropriate tools such as a screwdriver or drill to attach the hardware securely, following any provided instructions. Double-check the alignment and make any necessary adjustments before tightening all screws. Finally, give everything a test to ensure smooth operation.
Quality Assurance and Testing
To ensure the highest quality in woodworking projects, quality assurance plays a crucial role. Here’s a simple guide to help you inspect for flaws and defects, check for stability and sturdiness, and make necessary adjustments or repairs:
- Inspect for flaws and defects: Carefully examine the surface, joints, and edges of your woodworking piece. Look for any signs of cracks, splits, or rough spots. Use your fingers to feel for any unevenness or imperfections.
- Check for stability and sturdiness: Test the stability of your woodworking project by gently applying pressure from different angles. Ensure that it doesn’t wobble or feel shaky. If it’s a larger piece like a table or chair, sit or lean on it to confirm its sturdiness.
- Conduct necessary adjustments or repairs: If you find any flaws or stability issues, it’s important to address them promptly. Sand down rough spots, fill cracks with wood putty, or reinforce weak joints with additional screws or glue. Make sure to follow proper woodworking techniques and safety precautions when making adjustments or repairs.
For example, if you notice a small crack along the edge of a wooden table, use a chisel to widen the crack slightly, then apply wood glue and clamp it together until it dries. Sand down any excess glue and ensure a smooth finish. This will help prevent the crack from expanding and improve the overall quality and durability of the table.
Remember, quality assurance is an essential step in woodworking. By carefully inspecting for flaws, ensuring stability, and making necessary adjustments or repairs, you can create woodworking projects that are not only aesthetically pleasing but also durable and long-lasting.
Final Touches
To add final touches to your furniture piece, begin by applying any desired decorative elements, such as trims or moldings. Use a strong adhesive to secure them in place. Next, polish the surface of the furniture using a soft cloth and a suitable polish. Apply the polish in circular motions, working it into the wood until it shines. If desired, follow up with a coat of wax or varnish to provide a professional finish. Ensure that the surface is clean and dry before applying the wax or varnish, and follow the manufacturer’s instructions for best results.
The Final Touches
In conclusion, designing and building custom wooden furniture pieces is a fulfilling and rewarding endeavor. Throughout this guide, we have explored the key steps and considerations involved in this process. We have emphasized the satisfaction that comes from creating something truly unique and personalized, as well as the value of craftsmanship and attention to detail.
From selecting the right wood and tools to sketching out your design and bringing it to life, each stage requires careful planning and execution. By following these steps, you can create furniture pieces that not only meet your needs but also reflect your own style and personality.
Remember, the journey of designing and building custom wooden furniture is as important as the end result. Take your time, enjoy the process, and appreciate the beauty of working with natural materials. Whether you are a beginner or an experienced woodworker, there is always room to explore new techniques and refine your skills.
So, let your creativity flow, embrace the joy of woodworking, and embark on the adventure of designing and building your own custom wooden furniture pieces. With dedication and passion, you will create masterpieces that will be cherished for years to come. Happy woodworking!


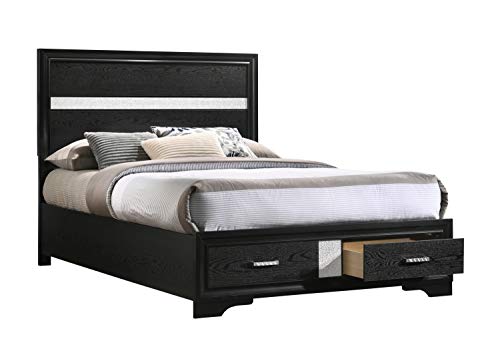
If you’re interested in contemporary wood craftsmanship, I highly recommend experimenting with different wood finishes to achieve unique and modern looks. For example, using a matte black finish on a wooden bookshelf can give it a sleek and minimalist aesthetic. Don’t be afraid to get creative and incorporate unconventional finishes into your designs!
This guide is fantastic for beginners like me, but I’m looking for some advanced tips to take my woodworking skills to the next level. Are there any additional resources or techniques that you would recommend for more experienced woodworkers?
I followed this guide and was able to design and build a beautiful custom dining table for my home. The step-by-step instructions were clear and easy to follow. The planning and design section helped me visualize the final product before starting the build. The joinery techniques section was especially helpful in creating strong and durable joints. I’m so proud of the finished piece!
Thank you for sharing your success story! We’re thrilled to hear that you were able to design and build a beautiful custom dining table using this guide. It’s great to know that the instructions were clear and easy to follow. We hope you enjoy your new table!
In step 7, when it comes to hardware installation, are there any specific types of screws or fasteners that you recommend for wooden furniture? I want to make sure I choose the right ones to ensure the durability and longevity of my finished piece.
When it comes to hardware installation for wooden furniture, it’s important to choose screws or fasteners that are appropriate for the specific application. For general purposes, wood screws with a flat or round head are commonly used. Make sure the screws are long enough to provide sufficient strength and grip but not so long that they protrude through the wood. If you’re working with hardwood, pre-drilling pilot holes can help prevent splitting. Additionally, consider using threaded inserts or dowels for added strength when joining pieces together. Always follow the manufacturer’s recommendations for the specific hardware you’re using. Happy woodworking!
I’ve been woodworking for a few years now, and one tip I can share is to always double-check your measurements before making any cuts. It’s easy to get carried away with the excitement of the project, but taking the time to measure twice can save you from costly mistakes. Also, invest in high-quality tools and materials for better results!
I really enjoyed following this guide to build a custom wooden coffee table. However, I decided to make a few modifications to better suit my needs. Instead of using traditional joinery techniques, I opted for pocket hole joinery for quicker assembly. The end result is a sturdy and functional coffee table that perfectly fits my living room. Thanks for the inspiration!
Thank you for sharing your personal variation! It’s great to see how you adapted the steps in the guide to better suit your specific needs. Pocket hole joinery can be a great time-saving alternative. We’re glad to hear that your coffee table turned out sturdy and functional. Well done!